

These homemade dinner rolls are so super soft and fluffy. And best of all, they are SO EASY to make! They are the perfect side to your soup and/or salad dinner, and can also be made in bulk for your Thanksgiving family gatherings! Don’t forget the rolls!

(This post may contain affiliate links. Using these links may result in a small commission for me at no extra cost to you. Thank you! Read my full disclosure here.)
Y’all… homemade breads are seriously about as close to heaven as it gets in my food world. I seriously just *might* be sitting here drooling just imagining the aromas that fill my home when I bake these rolls. Ah. You just can’t beat that!
Especially during the colder months of the year… walking in the door to the smell of fresh baked bread…… It’s like food therapy for all your winter woes. Soup and bread. Bread and soup. Yes. It fixes everything.
And even in the summer months, homemade dinner rolls are a perfect side to a summer salad! They are an all-year win!
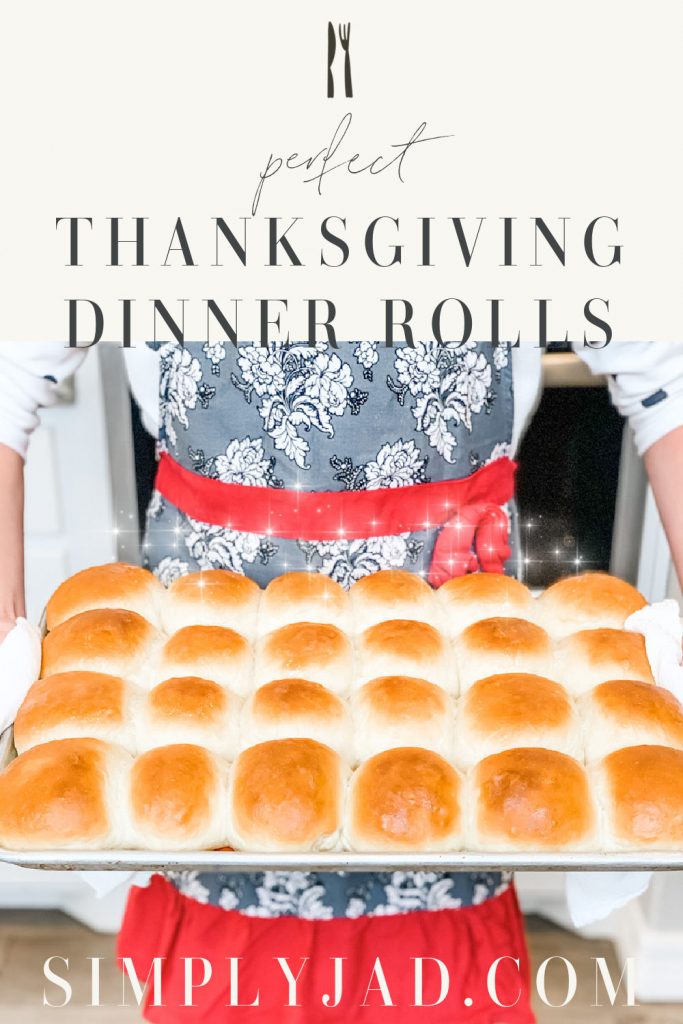
But of course, a very classic time to enjoy homemade rolls is at the family Thanksgiving feast! I can’t remember a single Thanksgiving meal that didn’t include rolls! (There’s a reason for that, y’all. 😉)
Instant SAF Yeast
I know a lot of people are intimidated to make homemade rolls because it is a yeast bread. It’s true that yeast can be finicky. But folks… it is really NOT hard to master it. I especially love using instant SAF yeast because it is extrememly non-finicky. I don’t think I’ve ever had it fail on me. Ever.
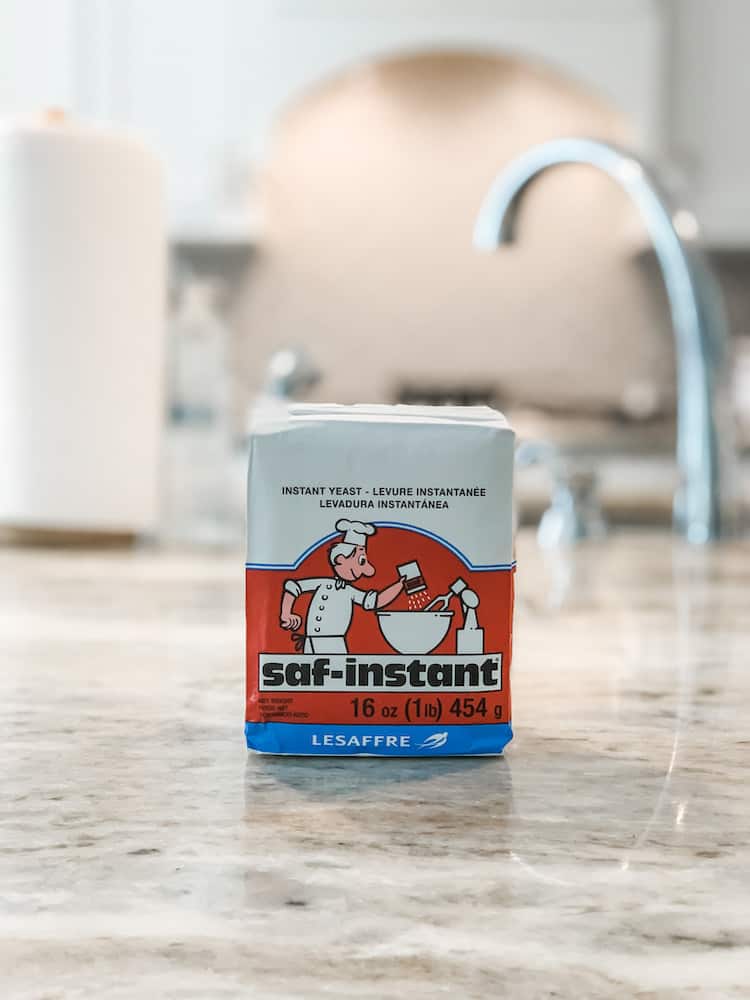
Instant yeast is usually the yeast you’ll find in bulk packages that are big, hard, blocks. It is quite resilient to temperature changes (meaning it won’t be ruined if your water is a little too hot or cold). And that’s why using instant yeast in your breads almost never fails.
De-Mistifying Instant Yeast
I remember when I first started learning to use yeast, I only ever bought the little single-use packets that you see in the stores. I would see these big ‘brick’ looking things that were supposed to be yeast. They were super hard and I thought “how in the world is that yeast??” (insert visions of having to chip yeast particles off of a brick using a chisel 😝)
It was a mystery to me. And since I don’t tend to be very adventurous, I would steer clear of the bizarre bricks of yeast.
It wasn’t until some time in my college years that the yeast bricks became de-mystified. Someone showed me what it was and I’ve seriously laughed at myself ever since for having been afraid of them.

So let me tell y’all… these ‘bricks’ of yeast are only hard because they are super vacuum sealed. As soon as you make a snip in the top of the package, the air enters and it loosens right up to a package of soft, regular ol’ looking yeast!
And now, any time I show someone how to use yeast, I make sure to always show them the ‘yeast bricks’! So that hopefully no one else is ‘afraid’ to use them like I was.
Storing Yeast
Now….. those blocks hold a lot of yeast. Which is fantastic, because I make a lot of breads that need yeast! But obviously we don’t want the yeast to go bad before we use it up. So we just need to store it properly.
A single ‘brick’ of yeast will fit perfectly in a quart jar. So I just open a brick, pour it into a quart jar, close it up with my reuseable mason jar lids, and then I store it in the freezer.
Yeast stored in the freezer will basically last for decades, y’all. So if you keep a brick or two (or five) in your freezer, you should never run out when you’re needing to make bread!
I keep enough yeast on hand to be able to make homemade bread for an entire year! But that’s another story for another day. Today we’re talking about homemade rolls. 😉

Easy Homemade Dinner Rolls
So now that we’ve de-mystified instant yeast, lets talk about how to use that yeast in these ah-maz-ing homemade dinner rolls!
I make these rolls in my KitchenAid mixer using the dough hook. I have the Pro 600, but I think most stand mixers should be able to handle this amount of flour with no problem. Just know your mixer’s capabilities.
I almost always make a full, big batch (24 rolls). Leftovers last beautifully for several days at room temperature, and our family goes through them easily. But if you don’t need a ton of rolls, you can easily cut the recipe in half to make 12 rolls in a 9×13 pan.
So to start, we’re going to add the water, oil, sugar, and yeast into the bowl of our mixer. Whisk it together.

Now, if you’re not using instant yeast, you’ll want to go ahead and cover your bowl with a kitchen towel and let it sit for about 10-15 minutes. This is called ‘proofing’ the yeast. Basically… it’s just making sure that your yeast is alive and well. At the end of the 10-15 minutes, you should see a bubbly fluffy mixture in your bowl.
However, if you are using instant yeast, you can actually skip that step and move on ahead. (Did I mention I love using instant yeast?) But you can also still proof your instant yeast if you want to.
Add about 3 cups of the flour, the eggs, and the salt. Give it another mix with the whisk to combine it all.
Next, fit the dough hook onto your mixer. Turn on the mixer (to a lower setting… about a 2-3 on the KitchenAid) and start adding the rest of the flour– a half cup at a time. With each addition, allow the flour to incorporate.
The trick to getting light, fluffy rolls (and the same is basically true with all yeast breads) is to add just enough flour for the dough to hold its form. Adding more than that starts to makes the dough heavy. You can generally tell when it’s the right amount of flour when the dough is just barely tacky to the touch. So when you touch it, it’s not wet and sticky, but it’s not dry either. A wee bit of the dough should still stick to your finger.

Start checking the tackiness when you’ve reached 5 cups of flour. If it’s still too sticky, add another 1/4 cup. And again if needed. But I wouldn’t go past 5 1/2 total cups of flour. Even if you feel it is a bit sticky, it will set up a bit more as it rests and rises.
Leave the dough in the mixer bowl, cover with your favorite kitchen towel, and let it rise for 30 minutes. You can shorten this to 10 minutes if you’re short on time. But 30 minutes is better.
While that’s rising, prepare your baking pan. For 24 rolls, you can either use two 9×13 pans, or I like to use a large jelly roll pan (roughly 12 x 17). I also line mine with a silicone baking mat and spray the sides/very edges with non-stick spray. But you could also just spray the whole thing with non-stick spray if you don’t have a baking mat.

After the dough has been sitting for 30 minutes, turn it out onto a clean, but lightly greased surface. (I spray my work area with non-stick spray as opposed to dusting it with flour because I don’t like incorporating any more flour than I need to.)
Knead the dough a few times and shape into a circle. Using a sharp knife (I spray it with non-stick spray as well), divide the circle into fourths. Then divide each fourth into six equal-sized pieces. (Just divide each quarter in half, then divide each of those halves into thirds… for a total of 6 pieces per quarter.) Check to see that all 24 pieces are more or less the same size. (You can take some from bigger pieces to add to smaller pieces if needed.)

Shape each of the 24 pieces into a little ball by tucking the sides under to the bottom.
Remember that activity we used to do in elementary PE with the huge parachute?… and everyone raises the parachute into the air and then runs under while still holding the edge and it makes like a mushroom cloud that you could sit inside of? That’s what this reminds me of. Tuck the edges under and pinch them together at the center of the bottom like you’re forming a mushroom top. Lol. 😝
Alternatively, you could also put your piece of dough on your work surface, cup your hand over it so that the edges of your hand are fully in contact with the counter, and then roll your hand around and around quickly in a circular motion. This should be moving the dough underneath and shaping it into a round ball.
Both ways work. I prefer the mushroom method. Hubby prefers the rolling method. 🤷🏼♀️
Place the prepared dough pieces evenly apart on your baking pan. (Four rows and six columns on the jelly roll pan.) Cover again with your kitchen towel and allow to rise until about doubled in size. (Roughly another 30 minutes.)

Bake at 375 ºF for 15 to 18 minutes, until they are beautifully golden on top.
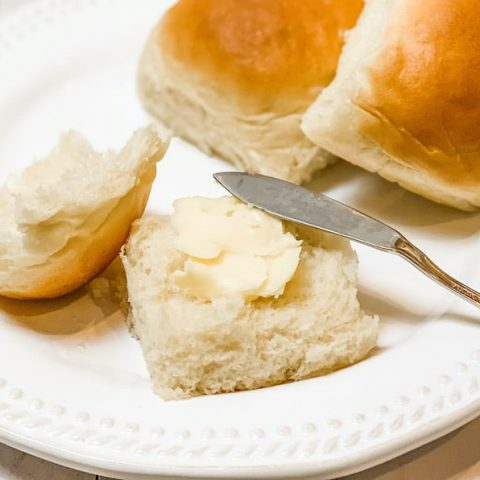
Allow the rolls to cool just a bit, then grab a stick of butter and ‘brush’ it over the top of the warm rolls. This adds a beautiful sheen that not only keeps the rolls a bit more moist, but also of course adds a touch of buttery flavor. 😉
Once cooled sufficiently to handle, separate the rolls into their individual pieces and serve (while still warm, if possible)! Serve with butter, jam, honey, or an amazing cinnamon honey butter! Oooo… now we’re talking! 😁😇

Store at room temperature in an airtight container (or zip tight baggie) for 3-5 days.
Enjoy these homemade dinner rolls, y’all!
Soft & Fluffy Homemade Dinner Rolls
Perfectly soft and fluffy rolls that pair beautifully with some homemade soup, and/or a dinner salad!
Ingredients
- 1 3/4 cup warm water
- 1/2 cup vegetable oil
- 6 Tbsp sugar
- 3 Tbsp yeast
- 5 - 5 1/2 cups all-purpose flour
- 2 eggs
- 1 1/2 tsp salt
Instructions
- In the bowl of a stand mixer, mix together the water, oil, sugar, and yeast until well combined. (You'll eventually be using your dough hook for these rolls, but for this step I just use a regular ol' whisk.)
- Cover the bowl with a kitchen towel and let the mixture rest for 15 minutes. (Can skip this step if using instant yeast.)
- Add about three cups of the flour, the eggs and the salt. Whisk it up again. Now fit the mixer with the dough hook attachment and start adding the rest of the flour, half a cup at a time and continue to mix well. The trick to getting light, fluffy rolls is to get the dough just to the tacky point. If you don’t use the full amount of flour, that’s okay. You just want to be able to touch the dough with your finger and have it stick a little, but not too much.
- Leave the dough in your bowl/mixer, cover and let it rise for about 30 minutes. (You can shorten this to about 10 minutes if you’re in a rush, but 30 minutes is better.)
- Prepare your baking pan. I like to use a large 12x17 jelly roll pan. But two 9x13 pans would also work. Spray them with non-stick spray, or line with a silicone baking mat (and spray the edges).
- Turn the dough out onto a lightly floured or lightly greased surface (I like to spray my surface with non-stick spray) and knead it a few times. (Remember, if it’s a little sticky, that’s okay! It may make it a little harder to work with, but you’ll appreciate the end results!) Just add a little extra flour to your kneading if desperately needed.
- Using a sharp knife (which I also spray with non-stick spray), cut the dough into approximately 24 equal pieces. (Cut the dough in quarters, then cut each quarter into six equal pieces.)Shape each segment into a little ball by tucking the end pieces under (they don’t have to look super pretty or anything, but just try to get the top smooth) and place evenly spaced apart onto your prepared baking pan(s). Cover the pan with your kitchen towel and let the dough rise again for roughly another 30 minutes until about doubled in size.
- Bake at 375 ºF for 15-18 minutes, until golden brown on top. Remove from oven and allow to cool about 5 minutes before brushing the tops with a butter stick. Allow to cool even further before separating into individual rolls.
- Serve (warm, if desired) with butter, jam, honey, or any other of your favorite toppings.
Also Check Out…
Consider serving these rolls alongside some of our favorite soups:

Shop This Post


Share this post

These look divine! I’ll have to try this recipe!
Thanks Alexa! They’re definitely my favorite rolls I’ve ever made. ☺️
These are simply perfect! and just in time for Thanksgiving!!
Thanks Michelle! 🙂
Oh these look amazing! I’m definitely going to try this one! Thanks for the recipe!
You bet! I hope they turn out perfect for family! Enjoy!
These look amazing! Can’t wait to try.
Thanks Megan! Let me know if you give them a try!
My mouth is watering! They really look sooo good.
Holy moly these look good! I pinned it and will be trying asap
Awesome Brittany! Let me know if you give them a try! I’d love to hear how they turned out!
Wow! These look fabulous!
Yummy! Saving this delicious recipe to try soon. Delicious looking and sounding.
Thanks Sarah! It’s absolutely my favorite roll recipe. ❤️ Totally give it a try!
These look AMAZING. My husband would die, he loves rolls so much and I’ve never made them!
Hope! If you’ve never made rolls, these would be a fantastic beginning point!! They’re easy and taste amazing! Total win. ❤️
These look easy enough for me. I’m a little challenged when it comes to making bread products but I will definitely give this one a try!
Awesome, Ashley!! They are super delicious and totally worth the effort required—which isn’t much… so it’s a total win. You’ll have to let me know if you try it!
These look delicious! I was intimidated by yeast for a long time, but the more I use it, the more I realize I shouldn’t have been intimidated for so long. Ha!
Kati, right? I think yeast is Blythe intimidating because people aren’t familiar with it. Once you try using it, I think most people realize it’s not scary at all. ❤️
How delicious! And I have to eat soft foods right now due to dental issues – these will be perfect.
Made these for my family and they were insanely delicious and so easy! Will be making them over and over for sure.
Yay Megan!! I’m so glad you tried them! They are definitely my favorite. I don’t know if I’ll ever bother trying any other roll ever again! Hahaha!
These rolls look delicious. I can’t wait to try them. Thanks for all the great tips on using instant yeast.