

Learn how to make–and can– a LOT of homemade applesauce! It’s SO EASY! I try to make enough each Fall to last our family for an entire year!

(This post may contain affiliate links. Using these links may result in a small commission for me at no extra cost to you. Thank you! Read my full disclosure here.)
It’s Fall y’all! And in this farmhouse, that means apples!
Sadly, they are not homegrown apples. Not yet anyway. Hopefully someday we can get apple trees to grow on our land. We’re 0 for 4 on the apple trees so far. 😢
But thankfully, I have a backup. I am part of a group that orders apples in bulk each fall. Ordering in bulk not only allows us to get a great price, but it also allows me to be able to make A LOT of apple goodness!
Applesauce, apple pie jam, dehydrated apples, apple pie filling… y’all… it’s a little slice of apple heaven in this house when it all goes down.
Today I’m gonna walk you through my process of making homemade applesauce, including how I preserve it through the hot water bath canning method.
There are lots of different ways to make applesauce. But after 10 years of doing this, I’ve got a system that works pretty darn good for me. Granted, every year I might adjust the system a little ‘this way or that’, but the overall method stays the same.

Also keep in mind… when I say that I buy apples in bulk, I’m not talking about an extra couple pounds at the store. I’m talking 5 or 6 BOXES of apples, y’all! That’s over 200 LBS of apples!! Sooo… it’s kind of important for me to find my apple groove so I don’t lose my apple mind! 🤣🍎
My Favorite Equipment For Homemade APplesauce
After all these years of processing apples, there are a few tools in my arsenal that I just simply would not want to be without.
The Apple Peeler/Corer/Slicer
The first is my apple peeler/corer/slicer. This gizmo becomes my absolute BFF during apple week. (It’s a thing.)

I have a total love-hate relationship with this tool though. Every year it inevitably starts to give me some attitude. The slicer will start going wonky, or the corer won’t hold still and moves all over, or whatever bit of chaos it chooses to inflict on me. But this gadget and I have kinda come to an understanding. It allows me to finesse my way through the whole apple week, and in exchange I agree to keep it for another year and not chunk it in the trash to become a landfill resident. 🤣
But seriously, these contraptions can be notoriously finicky. So if it starts to give you grief, just bear with it. Learn how to hold the pieces just right so that it stays on target, and before you know it, you will have made a best friend for life. (Yes… my family is embarrassed that I make friends with my kitchen tools. It’s okay.)
Large Pot with Steamer Basket Insert
Another helpful piece of equipment for making homemade applesauce is my large pot with the steamer basket insert. (Mine is a Calphalon 6 qt pot with 8 qt steamer basket that we were gifted at our wedding… 15 years ago now!)

I love this pot for a couple reasons.
One is that obviously a big pot is helpful for cooking down large amounts of apples at a time. (Side note: I also have a second large pot that I use–an IMUSA …I think it’s a 10 qt stock pot–which doesn’t have a steamer basket, but was much less expensive. So I use both and cook a ton of apples at the same time.)
A second reason I love this pot is that using the steamer basket allows me to make a thicker applesauce because I can leave the extra liquid behind when I lift the cooked apples out.
Which actually leads to the third (and main) reason I love it… and that is, when I lift those apples out and transfer them to another bowl, what’s left behind is some apple GOLD! It is the most delicious apple cider! Granted, I usually leave the extra juice in the pot until I’ve cooked down at least two batches of apples (resulting in a more concentrated apple cider). But after that, I pour that liquid into a cup (or pitcher… depending on how much there is) and the whole family enjoys getting a drink of this delectable cider. It is SOOO GOOD!

It’s my very favorite BONUS to making applesauce. 🍎
An Extra Large Bowl
Alright. When making large batches of homemade applesauce, regular sized mixing bowls just won’t cut it. Unless you want to dirty up a bunch of them. Which I don’t. So I just love my extra large tupperware bowl. (It’s a 32-cup capacity!)

It originally had a lid… which was helpful when I only had one large pot and had to cook my apples in batches. The lid helped to keep the apples warm while the second batch of apples cooked. But the lid has long since cracked. That’s okay, though, because since I have two large pots that I cook apples in simultaneously, I don’t need to keep apples warm in the bowl. But I digress.
The point is, this extra large 32-cup bowl holds just the right amount of cooked apples for me to be able to fill 7 quarts of applesauce. 7 is kinda the magic number I shoot for because it’s also the number of jars my canner will hold.
So I know that if my bowl is full, I will get my 7 quarts and can process a full batch of applesauce in the canner. And cooking two large stockpots of apples will usually fill my bowl just right. (See the beauty of having a system and a flow? …it all starts to work together for the greater good of my sanity and time efficiency!) ❤️
The Immersion Blender
And probably my last (but not least) favorite piece of equipment is my immersion blender. It makes quick work of saucing up those apples. Once the apples are cooked to a soft and mushy point, I dump them all into the large bowl and use the immersion blender to blend them down to the consistency I want. Easy peasy.

How to Make Homemade Applesauce
So now that you’ve seen all the equipment I use, it’s probably pretty obvious how this process goes. It’s as simple as:
- Peel, core, and slice the apples.
- Cook the apples till soft and tender.
- Blend/mash the apples to the desired consistency!
And THAT’S IT, y’all! Isn’t that amazingly easy??!
Choosing Apples For your homemade applesauce
Choosing the right kind of apple is likely the most important step to getting good homemade applesauce.
Granny Smith apples will be pretty darn tart, and red delicious will be pretty darn mild and blah.
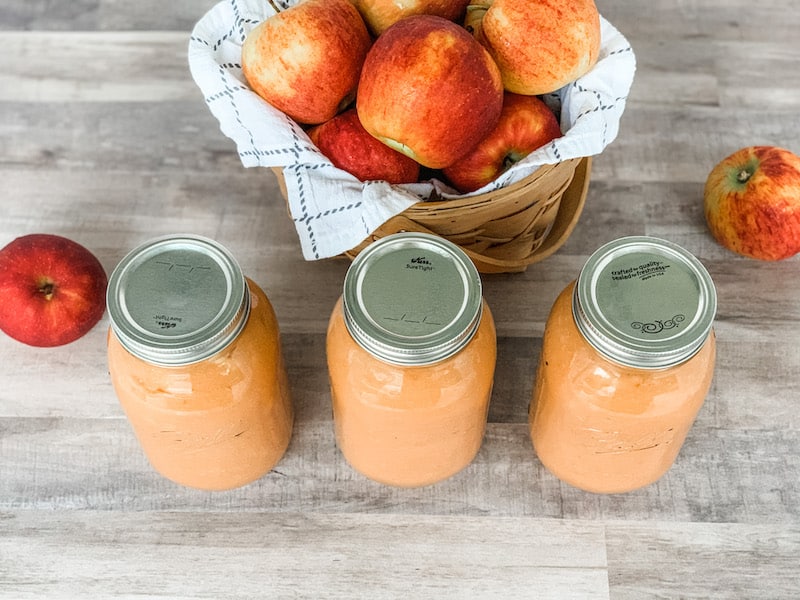
Some people recommend using a variety of different types of apples to get a well-rounded flavor. But honestly folks, all I have ever used is Jonagold (since that’s what we get in our bulk apple order) and it comes out ah.maz.ing. SO good.
Jonagold apples have a very delicious flavor all on their own. A beautiful balance between sweet and tart. And it makes for an amazingly delicious applesauce. I don’t use any sugar to sweeten it. It’s perfect just the way it is.
Other apple varieties with a similar flavor complex to Jonagold would be like a Fuji, or Gala, Pink Lady, or Honeycrisp… so you could likely use any of those (or a blend of them) and not need to add any sugar or anything to get an amazing flavor.
Peel, Core, and Slice Your Apples
After choosing and purchasing your apples, then next step is to peel, core, and slice them.
Obviously you can peel, core and slice your apples the regular ol’ fashioned way with a peeler and a knife. But y’all… when you’ve got 200 lbs of apples to process… the ol’ fashioned way just isn’t gonna fly. Not for me, anyway. That’s why I LOVE my peeler/corer/slicer I mentioned before.
[Side Note: Another option I’ve attempted before is to use a food mill/strainer. When you use the food mill/strainer, you don’t have to peel or core your apples in advance. You just wash and quarter your apples, soften them on the stovetop, and then run them through the mill (which separates the peels and seeds from the pulp). It seems super awesome, but I have just never been terribly pleased with the results. Several of my good friends, on the other hand, absolutely LOVE this process and swear by it! Sooo… take that for what it’s worth. I’ve decided to stick with my peerler/corer/slicer method.]

Tips for Using the Apple Peeler/Corer/Slicer:
- Put your apple on with the stem facing the prongs (meaning… stab it on the stem side, so that the bottom of the apple goes through the corer first). I did this the other way for YEARS y’all. And it was a head slap moment when I realized all the problems I could save by simply turning the apple around.
- Make sure the bottom of the apple is lined up with the hole in the corer/slicer piece (I like to even look through the coring hole to make sure everything is lined up… but eventually you’ll get a good feel for when it’s lined up or not)
- If your corer/slicer piece starts moving around as the apple makes contact with it (and you can’t seem to tighten it enough to make it stay put), just try holding your hand on/applying pressure to the corer/slicer piece to keep it in place as you crank until the apple has started to feed through it. Once the apple starts to go through, the corer piece should stay put and you don’t need to hold it in place.
- If you keep ending up with sections of peel left on your apple, adjust the depth of the peeler piece so that it peels deeper into the apple.
- Hold the base of your apple peerler/corer/slicer as the apple feeds through to keep it stable and keep the suction strong.
- Love on your apple gizmo. Say nice words to it. Never swear at it. You’ll hurt it’s feelings and it will refuse to work right for you. Truth.

Oh! And just a heads up… when you’re using these peeler/slicer gizmos, you’re gonna get apple juice dripping ALL over the place. So if you’re doing this on a nice countertop (i.e. granite), you’re gonna wanna protect that counter from the acidity in the juice. So I like to layer foil all around the peeler. And you’ll want to clean regularly underneath the foil, since some juices will still manage to sneak under there. Don’t ruin your countertops over this, y’all.
And if you want another pro tip: When processing a lot of apples, wear gloves. Not like the big bulky dish gloves. But just the disposable gloves. Trust me. You’re welcome.😝
Cooking Down the Apples
Alright. Next we’re gonna cook these apples down.
Technically, you can cook your apples any way you want in order to soften them up. You can use a crockpot, an oven (ooo… baked applesauce??!), and obviously a stovetop.
A crockpot would definitely be nice in terms of being ‘hands-off’, and would be great for making small batches of applesauce.
But I don’t make small batches. I make HUGE batches. So the stovetop is the only way I do this.

I add a small amount of water to the bottom of both of my large stockpots (the water helps to prevent scorching), add my peeled, cored, sliced apples and let them steam over medium high heat until soft and tender.
Be sure to stir occasionally, trying to bring the apples from the bottom up to the top (and vice versa). The ones on the bottom will obviously cook faster.
After roughly 20 minutes, the apples should be beautifully tender and starting to break down.
Blend/Mash Your Apples into Homemade Applesauce
Once the apples are nice and soft, dump them all into a large bowl. (Note: You can also just blend/mash them up right in the pot. But since I like to 1) get the cider from my steamer pot, and 2) blend them all at the same time, I just dump the apples into a big bowl.)

Using an immersion blender (or a potato masher, if you like chunky applesauce), blend your apples until they are the consistency you prefer! (This is a great job for the kiddos.) And Ta-Da!!!! It’s APPLESAUCE, y’all!
How to Can Homemade Applesauce
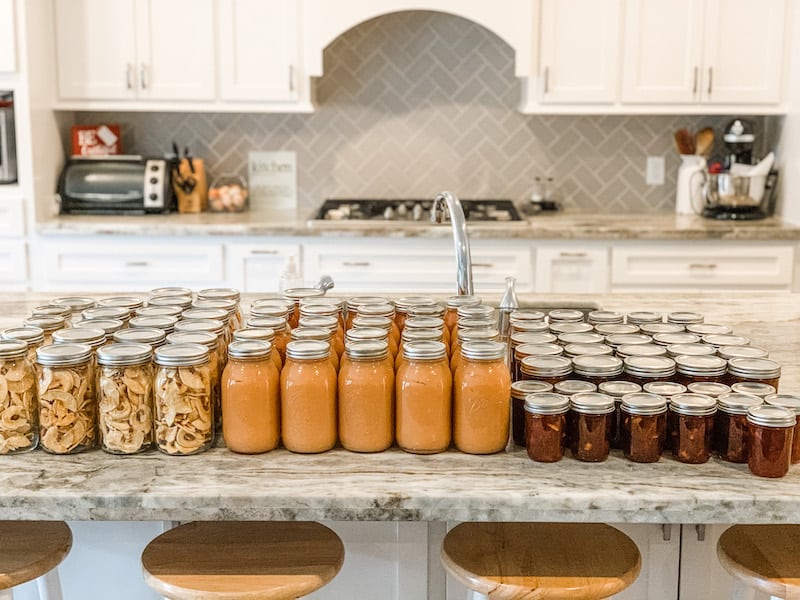
Now that you’ve got your delicious and precious applesauce made, it’s time to preserve it! I try to can enough applesauce each Fall to last us through the whole year.
We use homemade applesauce in lunches, in baking, for snacking, etc. So we go through quite a bit. This year I canned 26 quarts. That should last us. 😉
To can your apples, you’re going to need some basic supplies:
- glass mason jars of the size of your choice (free of knicks and/or cracks)
- lids and rings for your jars
- funnel and ladle
- a very large pot (i.e. a canner) with an insert to keep the jars off the bottom, or a pressure canner
- and a jar lifter (for putting jars in the hot water, and lifting them back out)
Water Bath vs. Pressure Canning
Apples have a high enough acidity that they do not have to be pressure canned. You can use the water bath method to can them. (The water bath method involves simply immersing the entire jar in boiling water and allowing it to stay in that boiling water for a designated amount of time.)
I still sometimes choose to pressure can my homemade applesauce (just because), but I have found that the reulting applesauce is darker than when I water bath the jars. So water bath tends to be my preferred method overall. But both ways are fine.
I’ll walk you through the water bath method, but the pressure canning method would basically be the same, but with following your specific pressure canner directions.
Prepare the Water Bath & Mason Jars
One of the first things you’ll want to do is to make sure your canning pot is filled with water (you’ll need enough water so that it will cover your jars… whatever size you’re using… with at least an inch of water) and start heating that water. Typically I actually start heating my water for the water bath at the same time I’m cooking the apples on the stove. That way the water is ready to go when the applesauce is done and I don’t have to sit around and wait.
(*A word of caution on heating your water… I don’t recommend bringing it to a boil prior to placing your filled jars in it. I have broken multiple jars by placing them directly into boiling water… even though they were filled with hot applesauce. So just heat the water to just below a boil for now.*)
Then you’ll also need to prepare your jars.

I like to use quart jars because anything less than that would just go way too fast in this household of 6. And that just isn’t worth my time. lol. But if you’re not feeding an army, then pint jars would also be a good option. 😉
Make sure there are no knicks or cracks in your jars, and be sure there is nothing stuck on the rim. (That wouldn’t be a problem for brand new jars. But if you’re reusing jars, sometimes food can get stuck on the rim. Soak the rim in hot water and the residue should come right off.)
You’ll also want to heat and sanitize your jars prior to filling them with the applesauce. Some easy ways to do this are to 1) run them through the dishwasher, or 2) put the jars in a warm oven with a little bit of water in them, or 3) stick them in the water bath canner while the water is heating up.
Fill & Close the Mason Jars
Once your jars are clean and hot, and you’ve got your hot homemade applesauce ready to go, go ahead and ladle your hot applesauce into your hot jars. (Note: Don’t try to ladle hot applesauce into cold jars. You’ll risk cracking your jars.) Using a funnel helps to keep things clean and tidy, and avoid spilling applesauce all over the place. But it’s technically optional.

Fill your jars until the applesauce is about 1/2″ from the top. (That remaining space is called ‘headspace’.) Then run a clean knife through the jar to help release any air bubbles. If you don’t release these air bubbles, they will try to escape during the sealing process and can make your applesauce seep out of the jar. Not a deal breaker, but it can keep your jar from sealing… plus make a mess in your canner and all over your jars. Ain’t nobody want that. 😜
After your jars are all filled and free of air bubbles, run a damp cloth around the rim to ensure it is clean and free from any particles. Place a lid on top (note: new lids are designed that they do not need to be heated first prior to canning, but you can if you want to) and add the ring band. Tighten the band just to ‘finger tight’. (That means you don’t crank it as tight as you can! You just tighten it until your fingers meet resistance.)
Canning the Applesauce in a Hot Water Bath
Place all jars in your hot water (using the jar lifter tongs). If you find that the water does not cover the tops of the jars (by at least an inch), then add more water until it does.

Bring the water up to a boil.
Once the water reaches a rolling boil, start the timer for processing the apples. For homemade applesauce you will process pints for 15 minutes, or quarts for 20 minutes. (Times are for low altitude.)
At the end of the alloted amount of time, turn the heat off. Allow the jars to rest for a bit before trying to remove them. Be careful removing super hot jars, as they can crack and break if the surrounding air is too cold. But when you’re ready, remove your jars (again, using the jar lifter tongs) and place them on a towel on the countertop to cool.
You will start to hear some popping and pings over the next hour or two. (Usually within the first 30 minutes, though.) This is the lid being sucked down as it seals. And once that happens, you can pat yourself on the back and stare at your successfully canned applesauce.
After 24 hours, remove the bands, give the jars a quick wash to clean off any juices that may have seeped out, replace the rings, and store in a cool, dry, preferrably dark location. Jars will be good for 1-3 years.

Canning FAQ
Q: What if I don’t have a canner pot? A: You can use ANY pot for a hot water bath, as long as it is deep enough that it can cover your jars with at least an inch of water. You also don’t really want your jars sitting directly on the bottom of the pot, but you can use any sort of rack that will fit in the bottom of your pot.
Q: What if my lid never seals? A: If, after 24 hours, your jar has still not sealed, you can either put that jar into the fridge and just eat it as you would any homemade applesauce, OR you can remove the lid, check for any food particles on the rim and clean it, place a new lid (don’t reuse the same one) on the jar and try to process it again. This needs to happen within the first 24 hours.
Q: What if some of my applesauce spills out of the jar during the canning? A: This is called seepage or siphoning, and it’s not a problem unless it has prevented the jar from sealing. (See the previous question for a jar that didn’t seal.) As long as the jar seals, the applesauce is still fine. You’ll just want to clean the jar off really well so that bugs aren’t attracted to the fruit on the outside of the jar. 😉
Q: What causes seepage/siphoning? How can I keep that from happening? A: A common reason for seepage is from leaving air bubbles in your applesauce. I try to remove any I can see with a knife, but sometimes I will also ‘bounce’ my filled jar on a padded surface to try and ‘burb’ the applesauce prior to putting the lid on. Another cause can be removing hot jars out of the canner too early into cool air. The temperature difference can cause the applesauce to siphon out from the jar.
Shop This Post
- Apple Peeler/Corer/Slicer (similar to the one I have)
- Large Stockpot
- Extra Large 32-cup Tupperware Bowl (this is the kind I have)
- Immersion Blender (this is the kind I have)
- Canner Pot (this is the kind I have)
- Jar Lifter Tongs
- ‘Secure Grip’ Jar Lifter Tongs (really good for those who do not have a strong grip)
- Stainless Steel Funnel (this is the one I have)
Share This Post


Wow, now that’s a lot of apples! I have a love for that same apple peeler/slicer/corer gizmo thing too. It’s pretty much the best and fastest way to prepare apples or pears ♥️♥️♥️
Shelby, I had never thought to use it for pears! What a fun idea. But I *have* used it for potatoes! Spiral potatoes are pretty dang fun to play with.
I have always wanted to make my own apple sauce and have been too intimated to try. Your recipe makes it so easy to learn, thank you!
You’re welcome Megan. 🙂 The actual applesauce part is so super easy! I hope you give it a try! The flavor is so so good! Store bought just cannot compare!
This is so amazing. I need to get that apple peeler/corer for sure. That’s the only thing stopping us from making apple products in bulk – doing it all by hand takes forever! Thanks for sharing, I’ll be saving this info!
Alexa, if you have access to apples in bulk, then you are so right… it takes WAY too long to do that by hand. The apple peeler corer has been a lifesaver and they’re not even very pricey. Total win. I hope you have fun with it! ☺️
never thought to use the oven and thanks for the tip on boiling water maybe that is why I broke so many last year
Jennifer, I love picking up new tips and tricks. Glad I could help ya with some. ☺️❤️
Was looking for an actual recipe. Although this is great info, I like print in or writing the recipes. That being said, would you have it written down that can be used? I do love this though, I want to can them in pint jars. I like the apple cider idea too.Thank you