Thick, delicious homemade Greek yogurt makes a delicious and healthy breakfast or nutritious snack for ANY time of the day!
One of my favorite things about living on a small little farm is having a milk cow. Oh my goodness if that farm fresh milk isn’t just so darn awesome!
We have had our milk cow for about 6 months now (and have actually gotten a second cow because so many people love the milk as much as we do! 😉) And in that time, we have been able to make SO many delicious things with that milk/cream! We’ve made butter (plus buttermilk), ice cream, cheese, and yep… yogurt!

(This post may contain affiliate links. Using these links may result in a small commission for me at no extra cost to you. Thank you! Read my full disclosure here.)
Now… I’ve actually been making homemade yogurt since long before we brought home our sweet Puddin’ cow. I’ve been making homemade yogurt and Greek yogurt for years now for two simple reasons: 1) it is SO much less expensive!, and 2) I control the ingredients.
Have you SEEN the amount of sugar that is in those little cups of yogurt??! Trust me when I say that I am a far cry from a health nut, but good gravy and biscuits! That yogurt is just a dessert in disguise!
Considering how good for you yogurt can be, it’s a shame to buy that stuff at the store and let a good thing go to waste. Greek yogurt is usually less of a culprit in the sugar department, but it’s still good to be the one who decides how much is enough.

Greek Yogurt vs. Regular Yogurt
So, what’s the difference between Greek yogurt and regular yogurt, anyway? No whey! What?! No way. Wait… I mean… WHAT??! 😅
Haha! Basically, it’s like this… Greek yogurt is a lot thicker than regular yogurt. This is because it is strained twice to remove extra whey from the yogurt. (The whey is the yellow liquidy stuff you see hanging out in your yogurt.) There’s not actually no whey in Greek yogurt, but there is a lot less than traditional yogurt. (But ‘no whey’ is more fun to say. 😜)

This is also the reason that Greek yogurt is higher in protein than regular yogurt. When you strain out more whey (which is not the protein-rich part), then–ounce for ounce–you end up with a more protein dense yogurt. Greek yogurt is a delicious way to get a whole lot of protein into your diet. 1 cup of greek yogurt has roughly around 20g of protein in it! That’s about 35-40% of your daily protein recommendations!
On top of that, it is also full of wonderful live bacteria and cultures that are so beneficial for your gut. (These are called probiotics.) Regular yogurt has them too, but Greek yogurt tends to have quite a bit more (you can check the labels to find out how many).
So I tend to prefer Greek yogurt over regular so that I can cram in the extra healthiness. It’s the little things that count. 😂
Homemade Vs. Store Bought Cost Analysis
Greek yogurt can be quite pricey at the store. But homemade Greek yogurt costs literally a faction of the price!
I know prices vary around the country/world, but these kinds of savings are going to come out in your favor regardless of where you live. Here in SE Texas, it costs me roughly $5 to buy a large container of Greek yogurt (which has roughly 3 1/2 cups in it). BUT when I make it at home, I can make 2 QUARTS worth of Greek yogurt (which is 8 cups!) for $2 and some change!

So that means Greek yogurt from the store is costing me $.70 per 1/2 cup (and that’s being frugal and buying the ‘cost effective’ large size), OR I can make homemade Greek yogurt for about $.30 per 1/2 cup (that’s adding a little extra for the culture and also flavorings). That kind of savings adds up fast y’all!
And it’s the easiest thing to do! All you’re going to need is:
- some milk,
- a heavy pot with a lid,
- a thermometer,
- and a yogurt culture (not as scary as it sounds… it’s just a bit of already made yogurt! 😉)
- oh… plus a large strainer, large bowl, and a flour sack cloth (or quality cheesecloth)
Type & Quantity of milk
Right now I use our farm fresh milk from our jersey cows to make my yogurt. But for years in the past I have just used regular ol’ nothing fancy milk from the store. I always used 2% milk because that’s what we had. But you can also make this with 1%, skim, or whole milk. They all work and it’s up to you what kind you want to use. (Although I have read that whole milk produces the best results.)
As for quantity… however much milk you use, you’ll end up with roughly half that amount in Greek yogurt. So that should help you figure out how much milk you want to start with. I always use a gallon of milk so that I end up with half a gallon (or 2 quarts) of Greek yogurt. And it stays good for a very long time, so I don’t worry about the 2 quarts going bad.

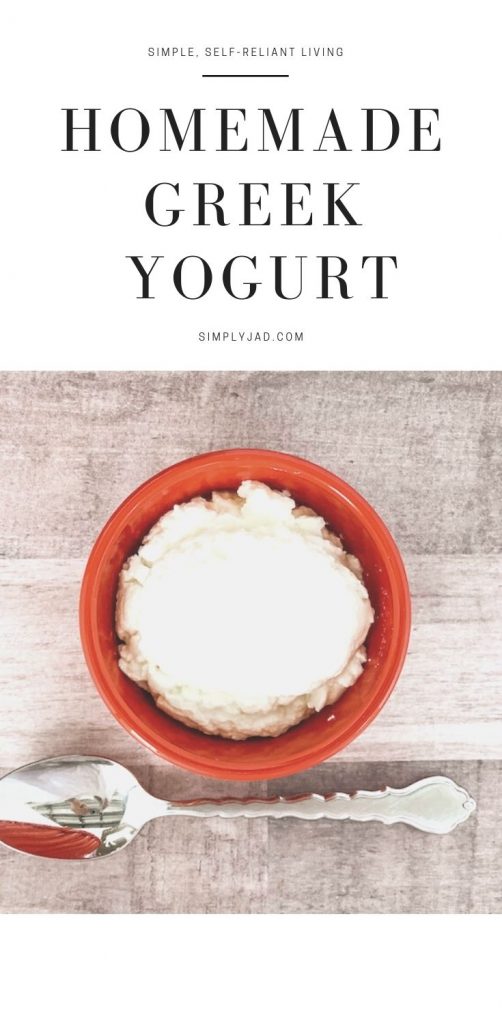
(Note: If you’re getting less than half the amount of Greek yogurt, you’ve probably let it strain too long and it will be super thick!! In my pictures here, I actually let it strain too long. I only ended up with 1 1/2 quarts. And yes… it’s suuuper thick.)
But let’s say you don’t have a household full of crazy kids and don’t want 2 quarts of Greek yogurt. Then simply use less milk! A 1/2 gallon of milk will yield 1 quart of yogurt; 2 cups of milk will yield 1 cup of Greek yogurt….. you get the idea.
But again, it does not go bad quickly at all. And since you’re putting in the effort… you might as well go big! 😁
Yogurt Culture
Really the only other thing you need besides milk is a yogurt culture.There are cultures that you can buy online in little packets specifically for yogurt making. And there’s quite a few options for types of culture as well. To me, the coolest kind are the heritage cultures. Once you get that culture thriving, you can use it over and over from one batch of yogurt to the next… indefinitely. Yogurt for life! But they do require a little bit of babysitting (you have to keep them alive), and I have yet to see one that produces the type of yogurt that I like from the store. They are usually quite a bit more thin and/or even runny.

So the other option–and the way I personally make yogurt–is to simply buy some plain (unflavored) yogurt from the store that already has the living cultures in it, and use a bit of that. You DO have to check the yogurt carton to make sure it states that it contains live cultures (it’s usually in small print somewhere) because not all yogurts are created equal. I also like to use Greek yogurt as my starter culture because, again, it often has more types of the live bacteria and I want all that extra goodness translating over into my homemade efforts. The best one I’ve found is the Greek Gods yogurt which has 7 different strains of live cultures. Awesome sauce.
Homemade Greek Yogurt making process
The process I use for making yogurt/Greek yogurt is so simple and almost entirely hands off.

- First you’re going to gently heat your milk up to 180 degrees F over medium heat on the stovetop. This is going to kill off any bacteria in the milk so that your yogurt culture has a clean slate to work with. Be sure to stir occasionally (scraping the bottom) so that the milk doesn’t scorch on the bottom. This will take roughly 25-30 minutes. Once it has reached 180F, turn the heat off.
- Then you’re going to let the milk cool to about 115 degrees F. This is the temperature that will allow your culture to thrive. Any cooler than 110F and your culture won’t wake up enough to spread. Any warmer than 120F and the heat will kill your culture (similar to yeast, if you’ve worked with that before). This part takes a while (roughly 45 minutes), but you can speed it up if you’d like by placing your pot in a bowl of ice water.
- Next you will add your culture to the milk and stir/whisk it in. I just use 1/3 cup of plain Greek yogurt to my gallon of milk. If you’re using a smaller amount of milk, you can use less yogurt culture.
- And then you’re going to let it culture for 8-12 hours! Cover your pot with it’s lid and place it in a warm location. The perfect spot for me is in the oven with the oven light turned on. You need to maintain the milk’s temperature between 110F and 120F (again, so the culture will stay active). It’s this part that many people worry over and buy fancy yogurt making equipment for. But if you’ve got an oven that you can keep the light on, that should be adequate. I put mine in the oven at night before I go to bed and let it culture overnight. I have also used a cooler before and set my pot in the cooler lined with towels to insulate and keep it warm overnight. But the oven is so much more easy.

- It’s YOGURT! When you wake up in the morning (or 8-12 hours later), you will find a beautiful pot of yogurt waiting for you in the warm oven. You will see a lot of yellow liquid around the edges. That is the whey. And in the middle will be a solid white mass of yogurt. If you want to stop here, you totally can! Just ladle the whey off (but don’t discard it– there are tons of uses for it, including making smoothies, waffles, pancakes, etc!) and then transfer your yogurt into your storage containers (I prefer to use mason jars). But if you want Greek yogurt, you will continue on to the next step.
- Strain and Drain. Set up a large strainer (it needs to be large enough to hold whatever amount of milk you used) so that it rests over a bowl. Line the strainer with either a floursack cloth, or a quality cheesecloth. (Don’t use a cheap cheesecloth with the larger holes– it’ll be a mess.) Scoop your yogurt into the cloth-lined strainer and allow the whey to start draining into the bowl beneath. Make sure that the strainer sits high enough over the bowl that when the bowl is filling with whey, they strainer will still be up and out of the whey. (Haha! Out of the ‘whey’! 🤣 Ok. Sorry. Bad joke. 😝) Cover the strainer with a lid (the lid from my pot happens to fit perfectly on top of my strainer), and bring the edges of the cloth up and over the lid. This protects the yogurt from any pesky flies that may want to come check it out, and by lifting the cloth corners, the whey doesn’t wick all the way down the cloth and onto the countertop. (I only had to make that mistake once! 😜)
- It’s GREEK Yogurt! Your yogurt will likely be strained to Greek yogurt consistency within 1-2 hours. Just check it every 30 minutes or so, and when it’s at the consistency you prefer (it will thicken even more as it chills… so be aware), scoop the yogurt into your preferred storage containers and you’re done! Just place it in the fridge to chill.

- Optional: Add your flavorings! If you don’t like to eat your Greek yogurt plain, add some flavor to it! I love to add vanilla extract and honey, or my favorite flavored jams (especially homemade!) to my Greek yogurt. Fresh fruit and some homemade granola are my other favorite toppings.
Okay. So I know that looks like a lot. But it’s really not! It really is as simple as:
- heat
- cool
- culture
- keep warm
- strain
So easy, right??! And it’s a fascinating process. I *still* get excited every time I see that a gallon of milk has turned into yogurt! It’s like magic! And…you know… a little bit of magic makes everything fun. ☺️

Self-Reliance Tips:
I know you don’t need a whole lot of yogurt culture to make this, but I have found that you can still buy the large container of the cultured yogurt and then freeze it in small portions to use for future yogurt making. Not only do you get a better price on the culture that way, but then you also have culture on hand for anytime you need to make another batch of yogurt.

I just use some silicone cupcake molds that I have on hand, fill them with the yogurt culture (they’re right at about 1/3 cup… so it’s perfect), freeze, and then put the frozen chunks into a ziplock bag and keep them in the freezer. When I’m ready to make a batch of yogurt, I just take one of the chunks out of the freezer at the begining of the process (when I’m heating up the milk), and by the time I need to add the culture, it is perfectly thawed.
This prevents having to make any last minute trips to the store when I want to make yogurt. It also means I can continue to make yogurt even when the stores aren’t fully stocked. 😉
Frequently Asked Questions:
- Can I use a milk other than cow milk? Ummm… I *think* so. But probably not with this exact same process?? I’ve never tried this with soy milk, or almond milk, or goats milk, or any other type other than cow milk. But if you try it, let me know how it turns out!
- Can I do this without heating the milk first? I know a lot of people (mainly those who use fresh/raw milk) would prefer not to heat/pasteurize their milk. Unfortunately, for this yogurt making process, you’re going to need to. Without heating the milk, the yogurt culture will have too many other bacteria to compete with in order to produce a good and successful yogurt. Just take comfort in the fact that you will be introducing other types of bacteria/culture that are wonderful for your gut. And if you cannot stomach heating your fresh milk (I know it costs a pretty penny to get that raw goodness!), then just buy some regular milk from the store for this. That being said, you CAN also purchase mesophilic yogurt cultures that will allow you to make yogurt at room temperature (without having to heat your milk), but those do not produce the same thickness that Greek yogurt does and they can be quite runny. I have tried it, but without the success that I was hoping for.
- Will it still work if I overheated the milk? Yes! (Well, most likely anyway.) I have totally scorched my milk before and had it boil over completely. I thought for sure it was ruined, but figured I didn’t want to waste the milk without at least giving it a shot. And it worked just as well as normal. Honestly, I have yet to mess it up when I’ve gone with this process.
- What if I don’t have a big strainer? There are multiple ways to get the whey to drain out of the yogurt. You don’t have to use a strainer. I have seen people scoop their yogurt into the floursack cloth, and then tie the corners of the cloth up around a wooden spoon. Then they rig up the wooden spoon somewhere (like through the handles of a cabinet, or some other creative way) so that the yogurt is hanging down over a bowl and the whey can all just drain down into the bowl. I actually used to do something like this, until I realized my strainer was big enough to hold all my yogurt and was a much simpler option for me. But the point is, you can be creative. You very likely have something that will work to get your yogurt draining. But if not, purchasing a large strainer isn’t a bad idea anyway. They’re pretty handy. 😉
- What if I let my yogurt strain for too long? Well, lucky you! You have just stumbled on another awesome kitchen creation… Yogurt Cream Cheese! Truly, yogurt cream cheese is simply yogurt, that has had so much of the whey drained out that it turns into a cream cheese consistency. I have definitely done this a time or two when I have just forgotten about my draining yogurt. The good news is the product is still totally useable. You can either 1) use it as cream cheese, or 2) return some of the whey to the yogurt and mix it back together to make it less thick. The texture will still likely be a little course, and maybe a bit less palatable, but still totally usable as a Greek yogurt… especially when you add mix-ins. So no worries. All is not lost. 😉
- Can I use the yogurt I just made to culture my next batch of yogurt? Yes! Sort of. 😜 You can reserve some of this new batch of yogurt to make your next batch of yogurt, but you can’t do this indefinitely (like you can with heritage cultures). But you can get a few batches worth out of it before you need to start with a fresh yogurt culture again. I haven’t played around with this too much, but I know it can be done.
So anyway, I sure hope this has given you a nudge in the right direction towards making your own homemade Greek yogurt! Remember… it’s as simple as: heat, chill, culture, strain!
So simple. So healthy. And so inexpensive! You’ll wonder why you haven’t done it before!
Shop This Post
- large 5-quart strainer
- flour sack cloth towels
- wide mouth mason jar reusable lids (I love these and have a TON of them!)
- quick read digital thermometer
- silicone cupcake liners

Can I add chocolate, peaches, blueberries or strawberries to this recipe?
I love frozen yogurt, it is delicious
Absolutely! But not until it’s done culturing. Then just add as much fruit or chocolate as your heart desires!! 🙂 If you’re talking about cocoa though… that might be a bit trickier. I’m not sure how that would work. But that sure sounds like a fun idea to freeze it! Any special techniques you use first? I’ll have to give that a try sometime.
Ok, I LOVE your tip for freezing portions for starting your next batch… that is brilliant! You put so much helpful info into this post – pinning for later!
Thanks Lauren! 🙂 I’m so glad you found it helpful!
Ok I did not realize making yogurt was this simple! I use yogurt for so many things! I need to try this recipe! Thanks for sharing!!
Michelle, I know right? It seems like it would be some very complicated process. But it’s so easy! I haven’t bought yogurt from the store in so so long now. And I love just always having it on hand.
I would love to have our own Greek Yogurt! I use it in so many things I cook. Pinned to try later. Thank you for this very detailed how to.